Client Settings
Under Client Settings in Accounts, you can set a multitude of preferences relating to account details, table views, certificates, accounts receivable, and more.
Edit Accounts Receivable and Allocations Settings
Access Client Settings
-
From Quadra, access Administration.
- On the left hand menu, go to the Accounts section.

- Click Client Settings.
- Advance through the tabs to access each section.
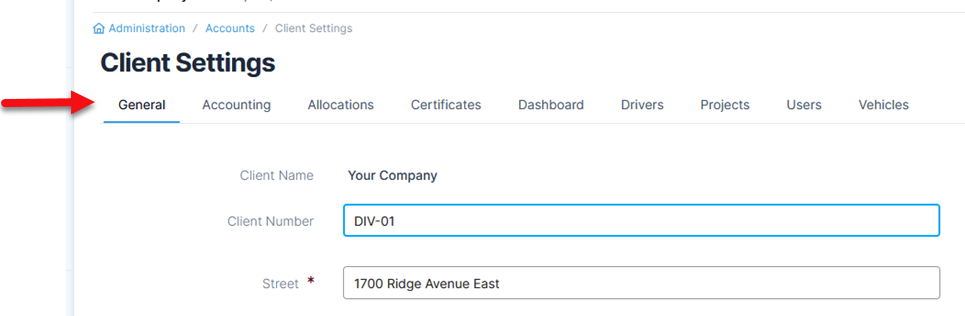
Edit General Settings
- Open Client Settings from Administration.
- Edit the General settings fields:
- Type in a Client Name.
- Type in a Client Number.
- Type in the address fields: Street, Street 2.
- Type in the zip code, then select Lookup Zip Code to autofill the City and State.
- Type in your company's Website.
- Select a Default Pyramid View. This option determines how the account hierarchy is presented. Read more about the Account Hierarchy.
- Select a Default Module. If a default module is not already selected by a user in the Preferences, then this option determines which module will appear when you first launch Quadra. If nothing is selected for this field, then the last chosen module will appear.
- Select a Time Zone. If a time zone is not already selected by a user in the user profile, then this time zone will be used.
- Continue to the Accounts Receivable and Allocations sections or click Save.

Edit Accounts Receivable and Allocations Settings
- Open Client Settings from Administration.
- Edit the Accounts Receivable fields:
- Select Yes or No to Allow Applying Payments to Future Invoices. If Yes is selected, the date of a payment can be earlier than the invoice date.
- Select an option to Allow Backdating Transactions. Use this setting to limit the users' ability to backdate transactions.
- Select Yes or No to Automatically Apply Unapplied Credit. If Yes is selected, credits will be applied where there are debits. This process occurs daily after business hours.
- Select Yes or No for Outstanding Invoices Retrieve All Funds. If Yes is selected, you can apply a credit to an invoice in any fund. If No is selected, Quadra will limit the available invoices when applying a credit to the credit's designated fund.
- Select an option for Outstanding Invoices Date Sort Order. The order will follow this client setting first. Payments will then be applied according to fund sort order. Lastly, payments will be applied according to bill type sort order.
- Select an option for Pivot Report Data By. This determines how data is itemized when a pivot report is run. Totals can be organized by month or fiscal year.
- Fill out or edit the Allocations field: Select Yes or No to Integrate A/R into Allocations. Read more about integrating A/R into Allocations.

- Continue to the Certificates section or click Save.
For the option Outstanding Invoices Retrieve All Funds: If you select No, only outstanding invoices of the payment's fund will be retrieved. If you select Yes, all outstanding invoices regardless of fund will be retrieved. The order of invoices a payment is applied against will follow the Outstanding Invoices Date Sort Order selection, then by fund sort order, and lastly by bill type sort order.
Edit Certificates Settings
- Open Client Settings from Administration.
- Fill out or edit the Certificates fields:
- Select a Certificate Location Type.
- Select an Insured Name on Certificate.
- If you selected Other for the prior field, you will need to type the name of the Client Organization, as well as the Address information in the following fields.
- Type in verbiage for ACORD 25/30 Description Preface. This refers to text that will precede Standard Verbiage on a certificate.
- Select the notification options for Underwriter Notifications.
- Continue to the Vehicles section or click Save.

Edit Dashboard Settings
- Open Client Settings from Administration.
- Edit the Documents by Category setting. In this setting, you have the option to change the accessibility of documents through the Documents dashboard element. You can either make the documents available to those who have account access or make them available to everyone.

Edit Drivers Settings
- Open Client Settings from Administration.
- For the option Allow Driver to Vehicle Linking, click either Yes or No. Read more about Driver to Vehicle Linking.

Edit Projects Settings
- Open Client Settings from Administration.
- To create custom sequences for automatically numbered projects, click Yes for Generate Project Numbers.
- Type in a Project Number Format. The format must include the {sequence:X} tag. X must be a number between 1 and 9. It can include a prefix before the {sequence:X} tag.
See examples below:
YC-{sequence:8}-L
{sequence:7}
MCL{sequence:5}
To see how the format will appear, click Test Format.

- Select an Project Number Sequence. You can select either an automatic unique identifier or a client sequence number.
Read more about using number sequences. - Click Save.

Edit Users Settings
Under Users, you can create specific rules for how many days lapse before a user account expires and how users should set passwords. Change the default settings as needed. Read more about managing users.
Please note that the option for using passwords for a minimum number of days appears when the expiration is set to 2 or more days.
- Open Client Settings from Administration.
- Edit the Users fields:
- Select a number for User accounts expire after (number of) days of inactivity. When an account is deactivated, login information is disabled and user notifications will no longer be sent. Upon deactivation, an email message will be sent to the user.
- Select a number for Passwords expire after (number of) days.
- Select a number for Passwords must be used for (number of) days before being changed. If a user attempts to change a password too soon, a notification will appear on the Change Password page. A similar notification will appear if the Password Recovery feature is used.
- Select a number for Password must contain at least (number of) characters.
- Using the check boxes, select which other types of characters should be included in a password: uppercase letters, numeric characters, etc.
- Select either Allowed or Not Allowed for Reuse previous passwords.
- Select a number for the number of times an incorrect password can be entered before the user is locked out of Quadra. The default setting is 3. If a user enters an incorrect password this many times, a Locked Out notification will appear.
- Select a required duration of time before a password can be entered following a lock out notification. The default setting is 30 minutes.

- Click Save.
Edit Vehicles Settings
- Open Client Settings from Administration.
- Fill out or edit the Vehicles Settings fields:
- Type in a name for Vehicles ID Card Include Name First if you want the name to appear above the insured's name on the ID card.
- Type in a name for Vehicles ID Card Include Name Last if you want the name to appear below the insured's name on the ID card.
- Select a Default COI Policy. If there are multiple COI policies for vehicles, this can assure the preferred policy is set as the default. Read more about creating policies.
- Select Yes or No for Notify if no rate class found? If Yes is selected, you will be sent a notification that one or more vehicles are missing rate classes.
- Click Save.
