Table of Contents
Add a Lease
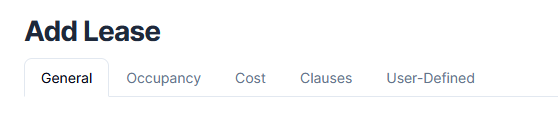
Add Lease
-
Open the Lease module of the account you plan to edit.
- Select Add Lease.

-
Fill out the information for each of the tabs. You also have the option to view sections as expanding groups.
There are three modes available to view sections when adding, editing, or viewing details: Tabs, Expanding Groups, and Underline. Tabs are shown by default. Read more about viewing sections.
Add General Information
- Enter the Lease Number.
- Fill in the Lessor and Lessee information. If the lessee or lessor options do not appear in the drop-down menus, click Add Lessor or Add Lessee to add the information.
- Select the Structure that is being leased.
- Select All or Part for the Square Footage. If selecting part, include the square footage being leased in the Part field.
- Select or type the Initial Start and Initial End Dates.
- Select Yes or No for Subletting Permitted.
- Continue to the next section.

Add Occupancy Information
- Select Add Occupancy.
- Select an option from the Occupancy Type drop-down menu.
- Select a Percent.
- Continue to the next section.
Add Cost Information
- Type in the Initial Monthly Rent.
- Select Yes or No for Lessee Pays Utilities.
If you select Yes, provide details on the utilities and percentage of the payment the lessee is responsible for. - Select Yes or No for Lessee Pays Repairs. If you select Yes, specify the types of repairs and if there are any limits.
- Select Yes or No for Lessee Pays Insurance. If you select Yes, include the Certificate Expiration Date.
- Select Yes or No for Lessee Pays Taxes. If you select Yes, specify the percentages of taxes (local, state, school, etc.) the lessee is responsible for.
- Enter the Security Deposit.
- Continue to the next section
Add Clauses
Enter fields related to Termination, Renewal and Extension Information:
- Select a number of days for both the Lessor Termination Notice and Lessee Termination Notice.
- Select Yes or No for Auto Renew. If you select Yes, the lease period will renew for the same amount of time as the initial period, starting on the expiration date.
- Select Add Extension Option if needed. Then select the Number of Months in Extension and the Rent Escalation %. When there is no renewal scheduled for the lease, Quadra will update the expiration date based on the number of months selected.
- Continue to the User-Defined section, as needed.
Add User-Defined Fields
- Make selections according to the user-defined fields specific to your company.
- Select Add Lease.