Table of Contents
Identity Provider Settings
You will need to obtain the following information from your identity provider and enter it into this section.
Edit Identity Provider Settings
Edit Identity Provider Settings
- Access the Identity Provider section from Administration.
- On the main Identity Provider page, fill in the following fields:
- Enter the Name of the IdP. This is a name you will give the connection. This name will appear under the Security section and in notifications.
- Enter the Authority. This is the URL of your company’s identity provider authority. You may test out the link by clicking Read OpenID Connect Discovery Document to make sure that Quadra can properly discover information about your provider.
- Enter the Client ID. This is the unique identifier for your registered IdP.
- Enter the Client Secret. This is a private passcode that works with the client ID to grant access to the user once the user has been validated.
- Enter the Acr Values, if needed. These are values that specify the degree to which authentication rules are met.
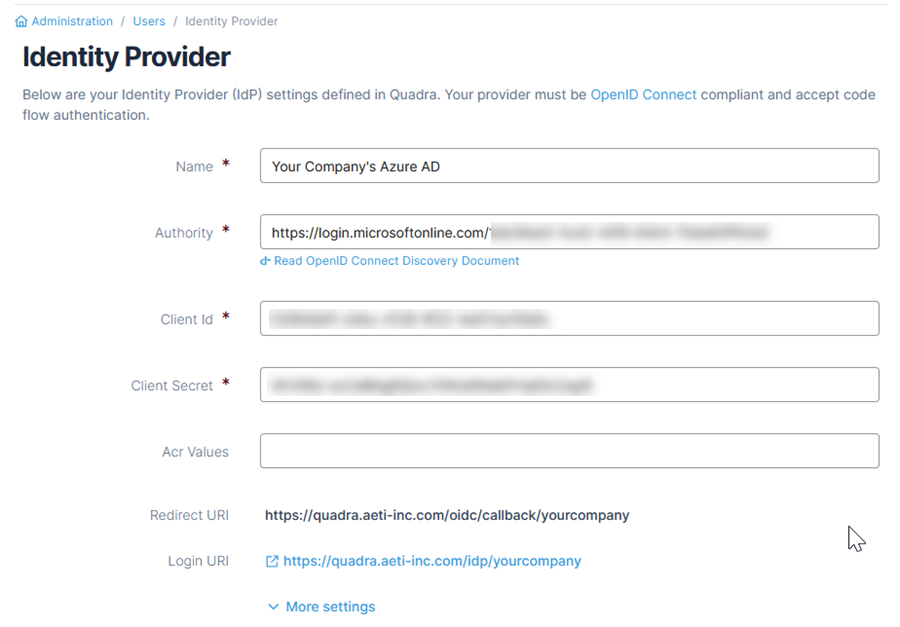
- Click More Settings for additional details. These are set by Quadra system administrators. Please contact support if you have questions or need to modify these values.

Edit User Provisioning Settings
Users that have never accessed Quadra before will have an account created on their behalf when they successfully log in to your company's IdP. These users are known as provisioned users. See section on editing user provisioning settings.
Provider Not Defined Message
If a connection with an identity provider has not been established for a client, this message will appear under the Identity Provider section in Administration. Please contact support to enable this feature.