Create an Invitation Link

You can invite team members to create accounts in Quadra and designate Roles for users so they can only access certain modules and permissions.
Edit or Delete Invitation Link
Create an Invitation Link
- From Quadra, access Administration.
- On the left hand menu, go to Users and click Invitation Links.

- Click Add Invitation at the upper left.

- Fill out the form:
- Type a Name.
- Select an Account. If an account is selected, the new user will only be able to access items within that account.
- Select the Role(s) that new users will have assigned to them once they accept the invitation.
- Select a Login Module, which is the first module they will see once they log in to Quadra.
- Click the Save icon.

You will see the link in the module grid with the name and description. There is also an expiration date (7 days from creation date) or the date on which the link expired.
Distribute Link to Invitees
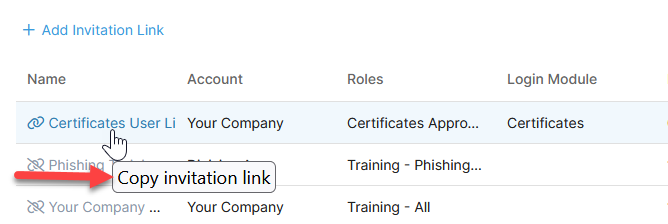
- After creating an invitation link, return to the main Invitation Links page in Administration.
- In the grid, select the link to be copied and click on the Clipboard icon. The link will be saved to the clipboard.
- Paste the link into an email or other communication.
Links will expire after seven days. Therefore, to ensure a prompt response from employees, please inform all potential Quadra users in advance that they will receive the link needed to create an account.
Edit or Delete Invitation Link
-
To edit an invitation link, select a link from the grid and under the action menu, click the Edit icon.
Please note that if the unedited link was used to create new users, the users' roles and accounts will stay the same. Changes to the link will only apply to new users who accept the invitation after editing. -
To delete an invitation link, select a link from the grid and under the action menu, click the Delete icon. After clicking Delete, click OK to confirm the removal.